Whether you’re a beginner or an experienced nail tech, understanding base coats is essential for long-lasting manicures. If you’ve ever struggled with peeling, lifting, or weak nails — the problem might not be your top coat or color, but your base coat. The base layer is often overlooked, but it plays one of the most important roles in any manicure. It’s the link between the natural nail and everything you build on top. Choosing the right type of base coat — and applying it correctly — can mean the difference between a manicure that lasts 3 days or 3 weeks. In this guide, I’ll break down everything you need to know about base coats: from soft vs. hard bases, to testing their pH, and how to safely strengthen even the most damaged nails. Whether you’re a beginner or a professional nail technician, this will give you the tools and knowledge to make better choices and deliver longer-lasting results.
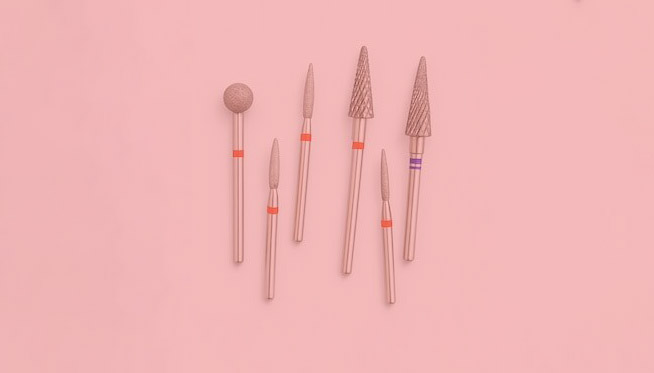
WHAT ARE THE DIFFERENT TYPES OF BASE COATS BY HARDNESS?
Test for Hardness:
Apply a thick rectangle of base coat on a clear file. After curing, peel it off, remove the sticky layer, and bend it:
-
Plastic (Soft/Rubber) Base Coat will bend and return to shape.
-
Hard Base Coat will crack when bent.
1. Plastic Base Coats (Soft, Rubber, Elastic)
Used as a substrate for hard bases, gels, and acrygels, or on their own for smoothing short, strong nails.
-
High flexibility can cause peeling or “cobweb” cracks on thin, active nails.
-
Don’t strengthen the nail even when applied thick.
-
May affect some pigment colors due to methacrylic acid.
-
Consistency: Thick to medium-thick.
2. Medium-Hard Base Coats (Strong, Premium, Extra)
Ideal for leveling strong, medium-length nails.
-
Like plastic bases, may cause peeling or cracking on thin nails.
-
Not suitable for weak nails.
-
Consistency: Medium or medium-thick.
3. Hard Base Coats
Used to reinforce thin, weak, or long nails.
-
Must be used over a thin layer of plastic base (with intermediate curing) for better adhesion.
-
Apply a small leveling layer — thin layers will crack or chip.
-
Removed only by filing, not with gel polish remover.
💡 Note: Hard base coats are still base coats, not gels. For very long or thin nails, combine them with a soft base for better results.
🧪 HOW TO TEST BASE COAT ACIDITY
Use pH test strips to check if your base coat is acidic, neutral, or alkaline:
-
Apply a thin layer of the base coat to the strip.
-
Wait a few minutes.
-
Compare color with the pH scale:
-
Red = High acidity (strong).
-
Yellow/No change = Neutral (safe).
-
To accelerate the test, you can dip the strip in water after application.
⚠️ WHEN DO YOU NEED AN UNDERCOAT?
-
If switching from acidic to acid-free base coats, wait until the nail plate grows out fully. During this time, apply an acidic base coat underneath the acid-free base.
-
Use acidic base coats:
-
For clients with hyperhidrosis (excess sweat).
-
When polish lifts or doesn’t wear well.
-
-
Hard base coats, gels, and acrygels always need a soft/plastic base underlayer for better adhesion.
HOW TO STRENGTHEN NAILS PROPERLY
Method 1: Hard Base Strengthening
-
Degrease nail.
-
Apply thin layer of flexible, pH-neutral base (cure 30s).
-
Apply hard base coat as a smoothing layer based on nail shape (cure 60s).
Method 2: Acrygel Reinforcement
-
Degrease.
-
Apply thin flexible base on ½ of the nail (cure 30s).
-
Apply acrygel on the same area (cure 60s).
-
Smooth with medium-hard or hard base coat.
For Moist Nails (Hyperhidrosis):
-
Degrease.
-
Dehydrate.
-
Apply acid primer (avoid skin and edges).
-
Thin acid base layer.
-
Level with hard base.
For Over-Filed Nails (Localized):
-
Degrease.
-
Apply soft/flexible neutral base (cure 30s).
-
Apply hard base coat (cure 60s).
🧪 DIY NAIL STRENGTHENING COMBOS
-
Flexible Base + Acrylic Powder (1:1 ratio)
-
Needs exact proportion: too much or too little powder weakens results.
-
Always apply a soft base layer underneath.
-
-
Flexible Base + Hard Base
-
Use soft base as foundation (acid-free or acidic depending on nail type).
-
Level with hard base coat.
-
-
Flexible Base + Hard Gel
-
Soft base as foundation, then reinforce with gel.
-
-
Flexible Base + Acrygel
-
Acrygel requires a soft base coat underneath to prevent chipping.
-
WHICH BASE COAT IS RIGHT FOR YOU?
-
Healthy nails: Any pH-neutral base.
-
Moist nails: Dehydrator + acid primer + thin acid base layer.
-
Weak/thin nails: Use a combination:
-
Soft base + hard base
-
Soft base + acrylic powder
-
Soft base + acrygel
-
-
Over-filed nails: Avoid application unless damage is localized.
⚖️ BASE COAT CONSISTENCY: HOW TO CHOOSE
Test: Drop base coat on nail tip and count seconds until it spreads
| Consistency | Spread Time | Best For |
|---|---|---|
| Liquid | 2 sec | Only as a foundation under hard bases. Not for leveling. |
| Medium-Liquid | 3 sec | Great for short nails or nails with a natural arch. |
| Medium | 4 sec | For short/medium nails. Fast leveling. Best for pros. |
| Medium-Thick | 5 sec | Easier for beginners. Allows corrections before curing. |
| Thick | 6 sec | Best for long nails or correcting shape/deformities. |
Having multiple consistencies on hand ensures you can meet every client’s needs.
🧫 Acidic vs. Acid-Free Base Coats
All bases contain methacrylic acid — the difference is in concentration:
| Type | Acid Level | Adhesion | Safety |
|---|---|---|---|
| Strongly Acidic | High | Very strong | Risky |
| Acidic | Moderate | Good | Safer |
| Acid-Free | Low | Moderate | Safest |
Use acidic base coats only when needed, and never alone for leveling or shaping.
SAFE PH LEVELS FOR NAILS
-
Natural nail pH: 7 – 7.5
-
Safe base coat: pH 5 or higher
-
Base coats with pH < 5 are acidic and should be used only as a foundation under hard products or in cases like hyperhidrosis.
Avoid using acidic base coats alone for nail alignment.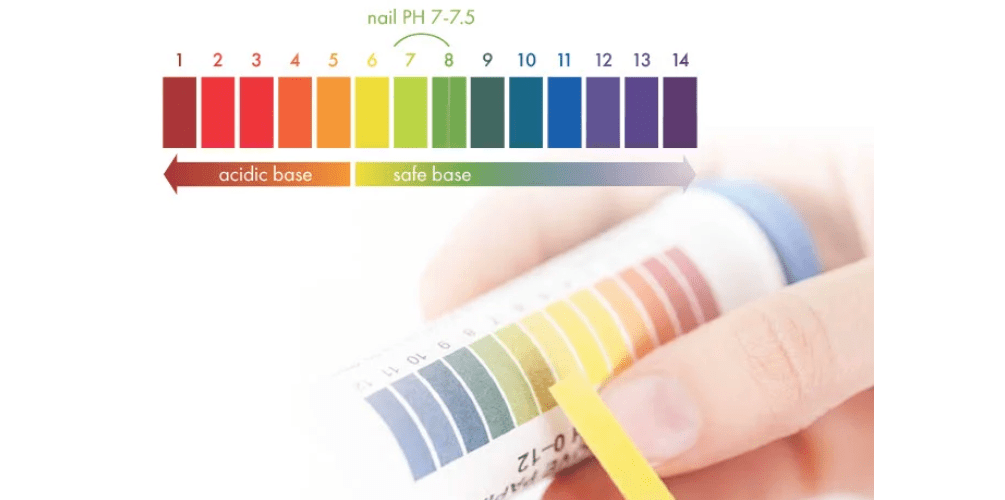
💥 WHY DO BASE COATS CHIP OR PEEL?
CHIPPING – Pieces of the coating break off.
DETACHMENT – Air pockets appear under the coating.
Causes:
-
Poor nail prep (oil, moisture, leftover remover).
-
Wrong base type for nail condition.
-
No underlayer before using hard materials.
-
Product applied too thin or too thick.
-
Under-cured materials.
-
Overuse of primer.
-
Mechanical damage or nail picking.
-
Long water exposure or poor nail architecture.
💬 Final Thoughts
Using the right base coat isn’t just about preference — it’s about nail health, wear time, and product performance. As a nail technician or DIY enthusiast, having a variety of base coats (with different consistencies, acidities, and hardness levels) gives you the flexibility to adapt to every nail type and challenge.
If you’re not sure which base coat is right for you, feel free to contact us here or explore our hand-picked selection of professional base coats below.